Sunday, November 3rd, 2019
Building a Soft & Huggable Version of Pixar's Handmade Hero
Forky (“Toy Story 4”) DIY Halloween Costume Build
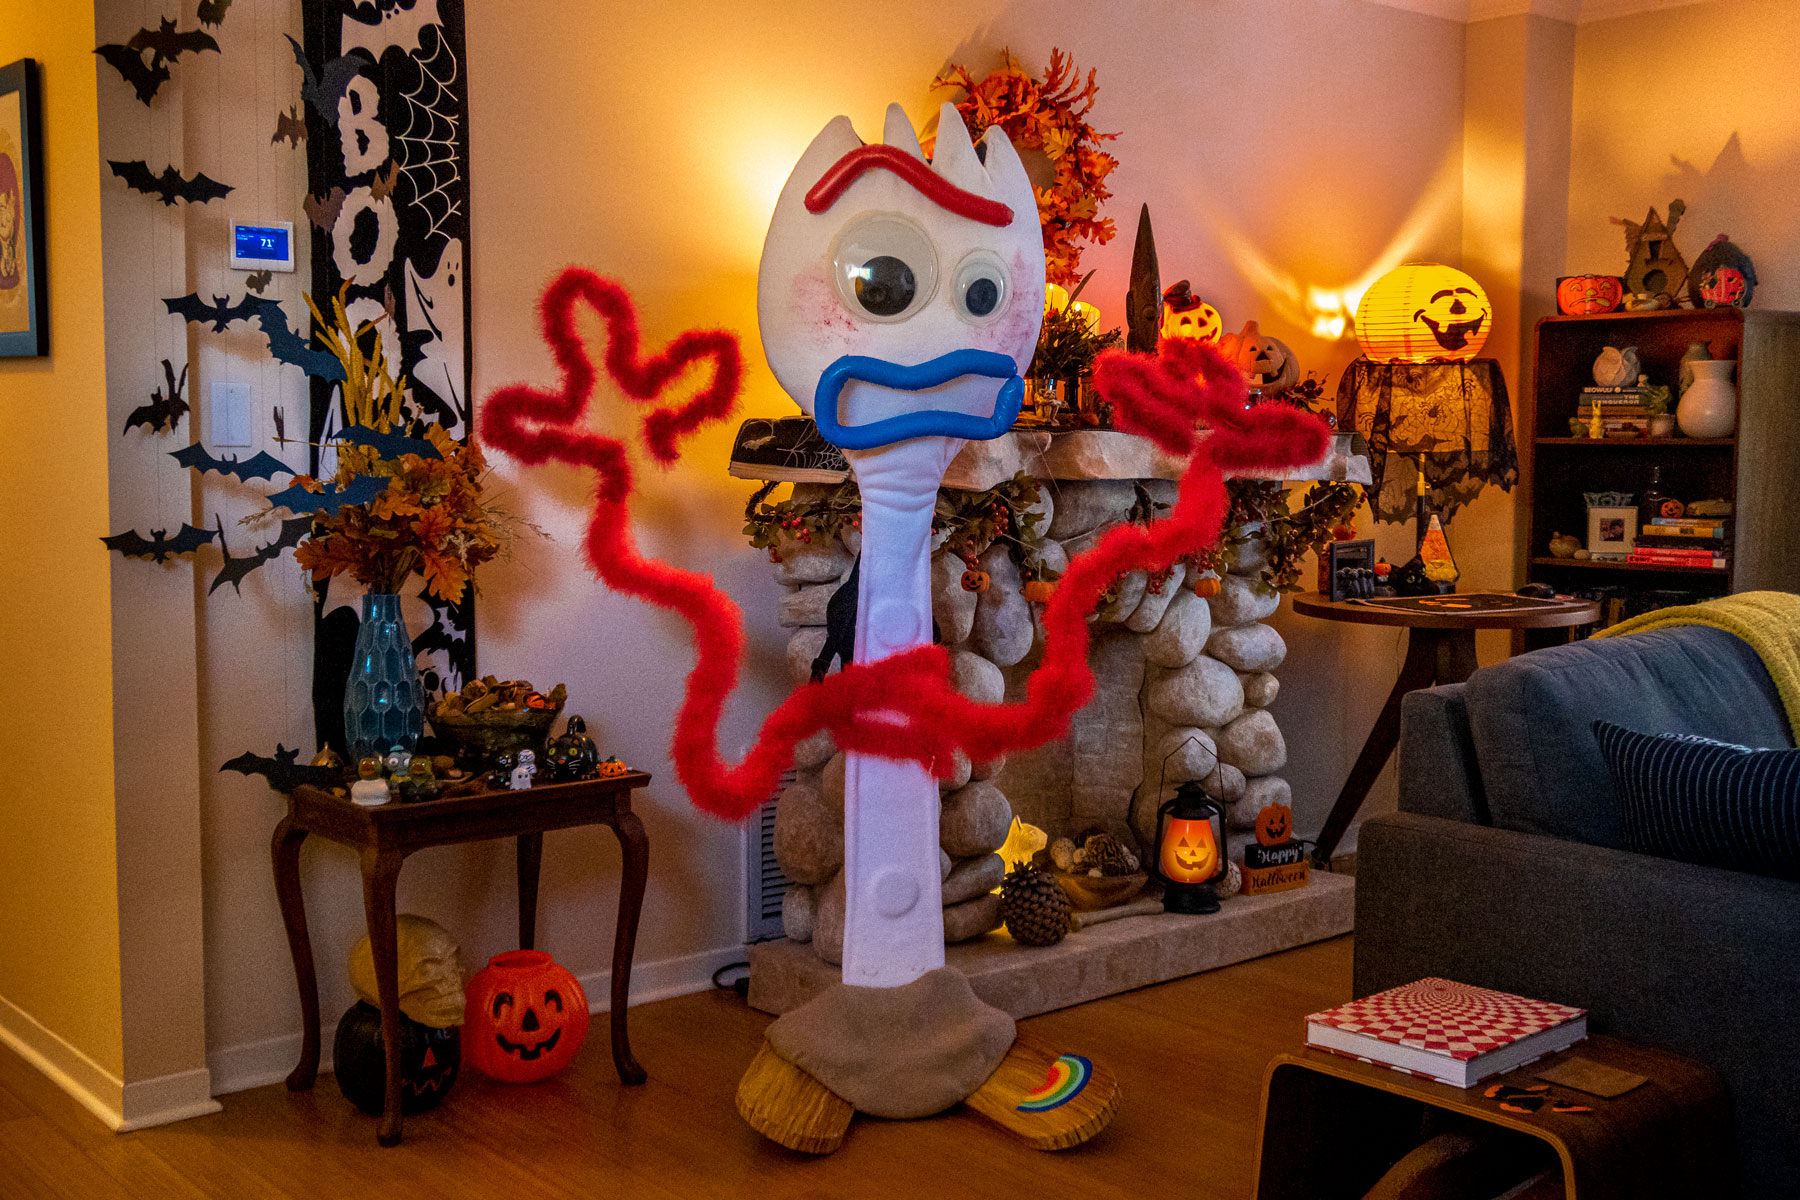
Forky, the reluctant trash-craft-turned-beloved-toy and breakout star of “Toy Story 4”, is possibly the most popular Halloween costume we’ve built to date.
Our Forky is scratch built from cardboard, rattan, fleece, and 25′ of feather boa; being kid-friendly (i.e. plush & huggable whilst also being sufficiently durable) was a foundational requirement.
He’s essentially a wicker basket (woven rattan forming the spoon spork bowl “head”) atop a cardboard handle, covered in batting and ultra-soft fleece. Feather boa wrapped rattan arms plus paper maché Popsicle-stick feet are attached with a lump of fleece-wrapped spray foam insulation “clay” completing the handsome feller.
His flouncy arms come alive via some marionette-esque puppeteering via a fishing line attached to his hands, pulled by the wearer (borrowing a trick from the actual Big Bird costume: a single line tethers the right and left hands, running through eyelets located at the top of Forky’s head (Big Bird has a similar hook on the underside of his beak), meaning moving one arm gives free and hands-off animation to the other).

Total cost outlay about $40 – $60.
Total time… well, let’s drop the pretenses, shall we? He’s a classic “One Day Build”, which, as Adam Savage is fond of saying: “always take longer than a day”. In Forky’s case he was easily three-plus person-days, with many store excursions. (Realistically I’m hard pressed to name a “true” One Day Build. Heck, a decent blog post would take me a full day+ … which is why you get these typo-laden stream of consciousness rambling sketches instead of tightly composed fully formed thoughts… sorry.)

Surrounded! Neighborhood kids’ interests seem evenly split between Forky “the character” and they guy behind him pulling strings.
Keeping within that vein, and acknowledging that you’re not here to learn how to make a silly Forky costume, but instead to glean a small dose of encouragement for your own project (right?), in this post, in lieu of a few poorly and incompletely reconstructed steps, I’ll share a few photos and sketches and just a few learnings.

Oh, my, how I love Forky’s back lit arms!
Important: You, most definitely, should build whatever it is you are thinking of building; it shall be more difficult, take longer, meander a frustratingly circuitous route of minor and major setbacks, end up nothing like what you presently think you’re building, and will be fantastic for your having expended the effort. Congrats and best of luck.

Forky costume sketch: key bits — such as the primary perimeter rattan — and assembly, quick-release straps, hooks, and carabiners for fitting his 5’6″ frame into the car.

Dry-fitting preview: you can see that the batting only covers the spork bowl. We were working out just how long we wanted the arms at this point. We went much, much longer to take advantage of rattan’s inherently exaggerated wobbly movements.
Learning #1: Rattan Is Awesome
Until earlier this year I’ve never considered rattan something I’d want to keep stocked in my build cabinet (note: I don’t have a build cabinet, of course, more a stack of tubs and sagging boxes of junk, errr, supplies). However, constructing an oversized body/fat suit for my “gadzooks! aren’t you done with that yet?” Krampus costume taught me otherwise.
Find a local rattan supplier and buy some, in multiple diameters.
 Our Forky’s head is the lightweight (~4mm rattan) beginnings of a woven “basket”, forming the bowl and neck of the spoon (see photo where it looks like I’ve made an impractical fencing mask).
More useful, however, turned out to be using 8mm rattan for the arms and reinforcement on the spork handle (a single rattan running around the cardboard’s perimeter).
(hey, grammarians, is it “rattan” or “rattan rod” or “stick” to refer to a single rattan piece?)

Using a creme brûlée torch and a jig (just a few finish nails tapped into some scrap plywood) are key in shaping the rattan into the specific wavy-arms and tightly loop hand shapes. And it turned out to be incredibly fun. The jig was useful once I had more or less the desired shape and just needed some extra heat-treatment confidence it’d not spring back into its original straight form.
(I did toy with soaking the rattan but direct flame is so much faster and seemed better able to “set” tight curves)
A bit of red paint before wrapping the arms with the boas was all that was required.

Using creme brulee kitchen torch to “set” the rattan arms, and the finish nail jig.
The arms held up to hours of kids grabbing and tugging, though I did worry a one gal wanted a photo with her lap dog (I’m wary of feisty, handheld or purse dwelling dogs).
Learning #1.B: Rattan Likes To Move
 One mistake I’ve made (more than once) is attempting to “lock-in” rattan. Using a zip-tie to hold two overlapping pieces works well. Adding a dollop of hot glue, on the other hand, can make the whole thing too unforgiving — and it might snap. Better to allow pieces to move across one another.
Learning #2: Channel Your Inner Bob Ross
The simulated wood grain really caused me trouble. Until I thought “how would Bob Ross approach this?”. Painting base colors like he did skies (or water, or snow, or clouds, or streams…) turned out to be just the trick.

After a couple failed attempts employing Bob Ross’s “sunset sky” approach actually worked for streaked base wood coloring.
Then, literally muttering “maybe, maybe…” to myself, I used a fan brush to do the graining, aping how professional faux finisher employ feathers to vein marble.

Multiple passes with numerous colors using a fan brush create the wood’s grain.


Of course we did. “Bonnie” sponged on. Yes, the “nie” should be going the other way, but I only saw the movie the once and.. and… well, I didn’t think of it until the paint had dried. 🙁
Forky’s Popsicle stick feet are essentially reinforced boxes:

The folded cardboard sandwich adds incredible strength to the outer top & bottom pieces.

As always, alternate newsprint with craft paper when paper macheing makes keeping track of how many layers you’ve applied much, much easier. Generally want 4 – 9 layers, depending upon how durable you want your final piece.
Learning #3: Spray Adhesives Are Two Person Tasks
 Perhaps I got a bit cocky, but I spectacularly failed on first attempt to cover the “clay” with fleece. In fact, I stepped directly on the just-glue-coated fabric and got the fleece, my socks, the work paper, and my ankles all glued and… it was predictable and incredibly stupid (think Buster Keaton with a wastebasket on his foot).
Second attempt Ludlow and I did together and this went much, much better. We literally practiced, working in stages, choreographing how much we would adhere in each go.
Applying 3M 77 or Abad Foam spray glue on both the target surface and the fabric back, allowing both a few minutes to get tacky, and then slowly, cautiously, with four hands and keeping the fabric taut the entire time, we laid it on.
Like I said: two person job, don’t cheat this.
Learning #4: Give Yourself Options
 I never had a clue how to build this thing, just a checklist of pieces I’d need, and knowing I’d eventually need them all to come together. So assuming an adaptive flexible attitude was key. Moreover, building a adaptable piece for the “future you” was also incredibly helpful.
The clearest example of this is attachment points.
Knowing Forky’d probably hand around wearer’s neck or shoulders, and that he’d need to be at least partially modular (to fit in a small car’s boot) wherever possible I added reinforcements and hooks (paint stir sticks with zip ties looped through, glued to the parts)
In the end we needed only four of the more than a dozen hooks and just two of the three dozen holes we’d made, but we had no way of knowing in advance just _which_ of those superfluous points we’d eventually need: better safe than sorry.
 (we were doing some final, and not insubstantial, final assembling on train platform headed to Haunted Little Tokyo block party, so having a well-stocked travel repair kit and many options proved invaluable)

A slightly-stretched rainbow “sticker” (a quick bit of Adobe Illustrator work) because a precise rainbow arc seemed contrary to Bonnie’s child-world or Pixar’s “leave nothing to chance” whimsy style.
Materials & Supplies
Not an exhaustive survey, but here’s key list of bits that went into Forky.
Supplies:
- 2 yds white fleece
- 1 yard taupe fleece (clay foot)
- 1 yd batting
- 30′ 8mm rattan
- 40′ 5mm
- 25′ Red Marabou Feather Boas (15 Gram)
- 1 1/4″ foam pipe wrap insulation
- ~2′ armature wire
- printed rainbow “sticker”
- large dollar store googly eyes (just wanted the plastic domes — we cut our own white card stock eye whites and thick black pupils since he has very dilated pupils)
- paint stir sticks (reinforcements for attachment points)
- red & blue colored Duck brand duct tape
- paper maché (cheap newsprint, our local weekly, thin craft paper, with flour-and-water glue)
- fishing line
- carabiners (attaching clay foot)
- S-hook (attaching arm to suite front)
- luggage strap w/swivel snap hook
- Abad Foam brand spray foam glue
Tools
- box knife
- fabric scissors
- awl (for pokin’ holes)
- drill/Dremel (for pokin’ bigger holes)
- tie pliers or pliers + wire cutters
Staples
Normal supplies/expendables you probably already have on hand (or at least should)
- glue gun
- zip ties
- Mod Podge (glue/sealant/miracle goo)
- floral wire
- glue sticks
- masking and painters tape for temporary holds
- assorted acrylic paints and matte medium
- natural sponge and assorted paint brushes
Resources:

Photo-op spot at “Haunted Little Tokyo” Halloween block party 2019 (via Instagram)

